
Creating a relevant set of wireframes for a mobile application requires you to know the basics of the user experience: how screens can be linked with each other, which states each screen can have, and how the application will behave when it is opened from a push notification.
Don’t be afraid to mix formats. By doing this properly, you take advantage of the strengths of each format. In our experience, mixing user stories and wireframes makes the most sense. While the user stories describe the features of the application and provide a business case for them, the wireframes show how these features would appear on the screens of the app. In addition, putting together user stories and wireframes would take you less time than writing an FSD, with all of its accompanying detail and descriptions of the interactions.
Start by sketching out wireframes for the application. Once the wireframes are done, add two or more user stories for each screen, describing what the user can do on that screen. We’ve found this approach to be the most appropriate for mobile application development, so we use it a lot.
I’ll take our What I Eat application as an example. I’ll compose the requirements document as if we were developing the application from scratch.
First, let’s formalize the idea using Steve Blank’s XYZ pattern: “We help X do Y by doing Z.” The premise of the application is to enable users to take control of what they eat during the day and of their calorie intake. According to the XYZ method: “What I Eat helps those who care about their weight to track calorie consumption by providing functionality for a simple meal log.”
As mentioned, mixing user stories and wireframes works best for us, so why not use them here?
The next step is to describe the What I Eat app as user stories, screen by screen. We’ll begin with the application’s start and home screen:
To avoid any ambiguity, we’ll create a wireframe for this screen.
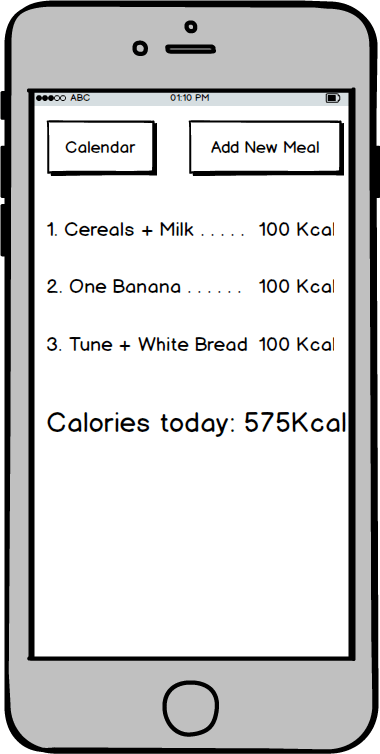
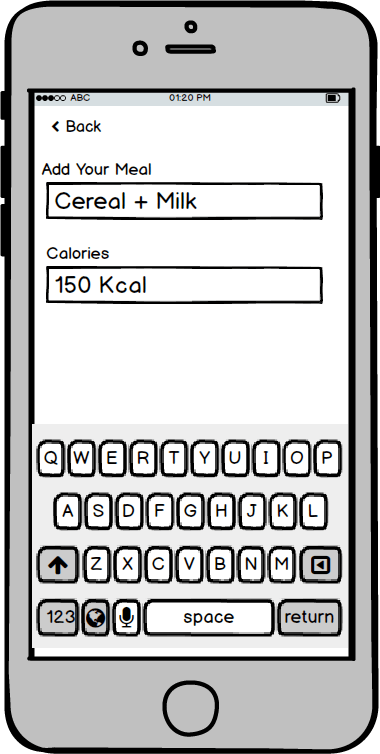
As you can see, we weren’t able to put the “Add new meal” functionality on the home screen. Instead, we added a button to navigate to another screen that presents this feature. Now, we need to put together user stories for this new screen:
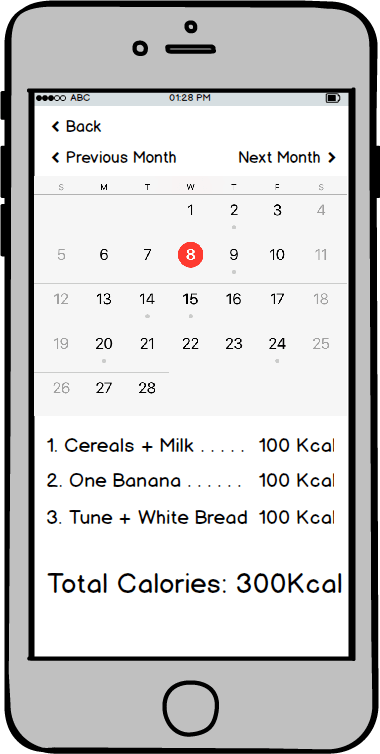
The home screen has a button that opens the calendar. Because there are many other calendar apps, checking their designs first makes sense. We like the iPhone’s default calendar app, so we will use it as a reference.
We will also put a piece of the iPhone calendar’s user interface in the wireframe.
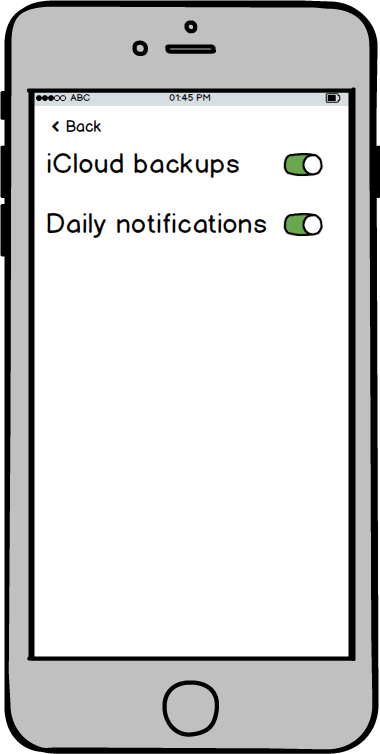
Finally, we need to add some settings to the app.
Phew! Almost done. The final step is to put the wireframes and user stories together in one document, with each wireframe and its respective story on its own page.

In addition, we can draw a map to visualize how the screens are connected to each other. We’ll use miro for that.
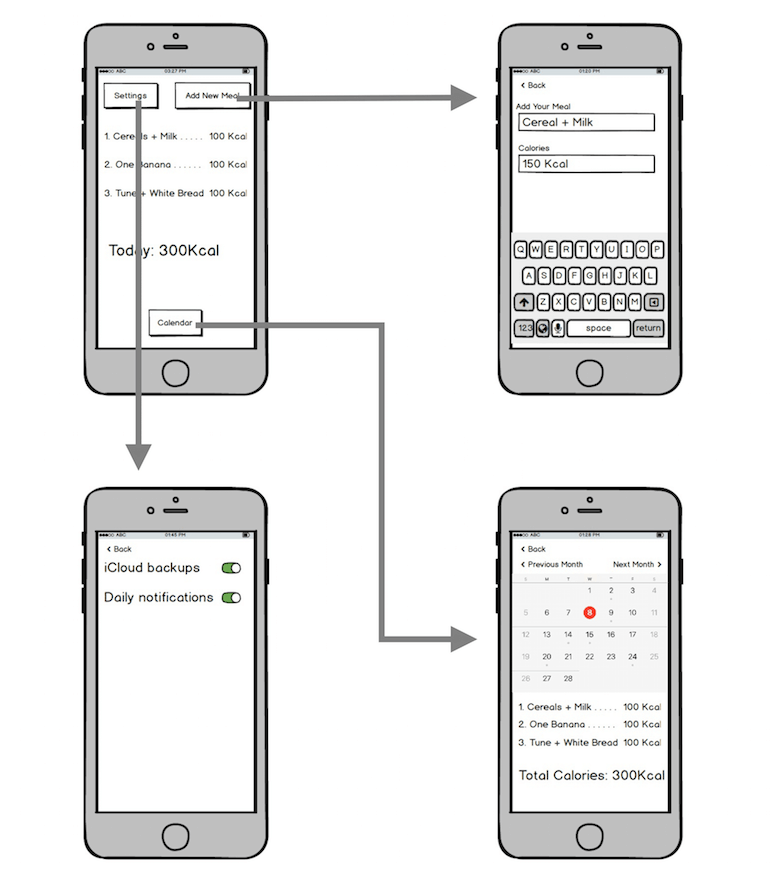
In doing the screen map, we realize that there is no button to go to the settings screen, so we’ll add that to the home screen.
We have created two documents: a PDF with user stories and wireframes, and a screen map that complements the PDF. Together, they describe in detail what features the application should have. We can go ahead and send that to our developer. This time, the application he delivers will correlate with your vision.
Generally speaking, writing a requirements document is mostly about conveying your vision to the rest of the team. Don’t limit yourself to the methodology described above. Feel free to experiment and find the solution that works best for you.
Delve deeper into the subject with the following resources:
We’d love to hear about your approach to creating requirements documents. Please share your thoughts in the comments.
(da, vf, yk, al, il, mrn)